In Microsoft Fabric data factory pipelines, specifying name of a single notebook is straight forward. You will create a Notebook activity in pipeline. In settings select workspace name, and then notebook name from list of notebooks present in workspace.
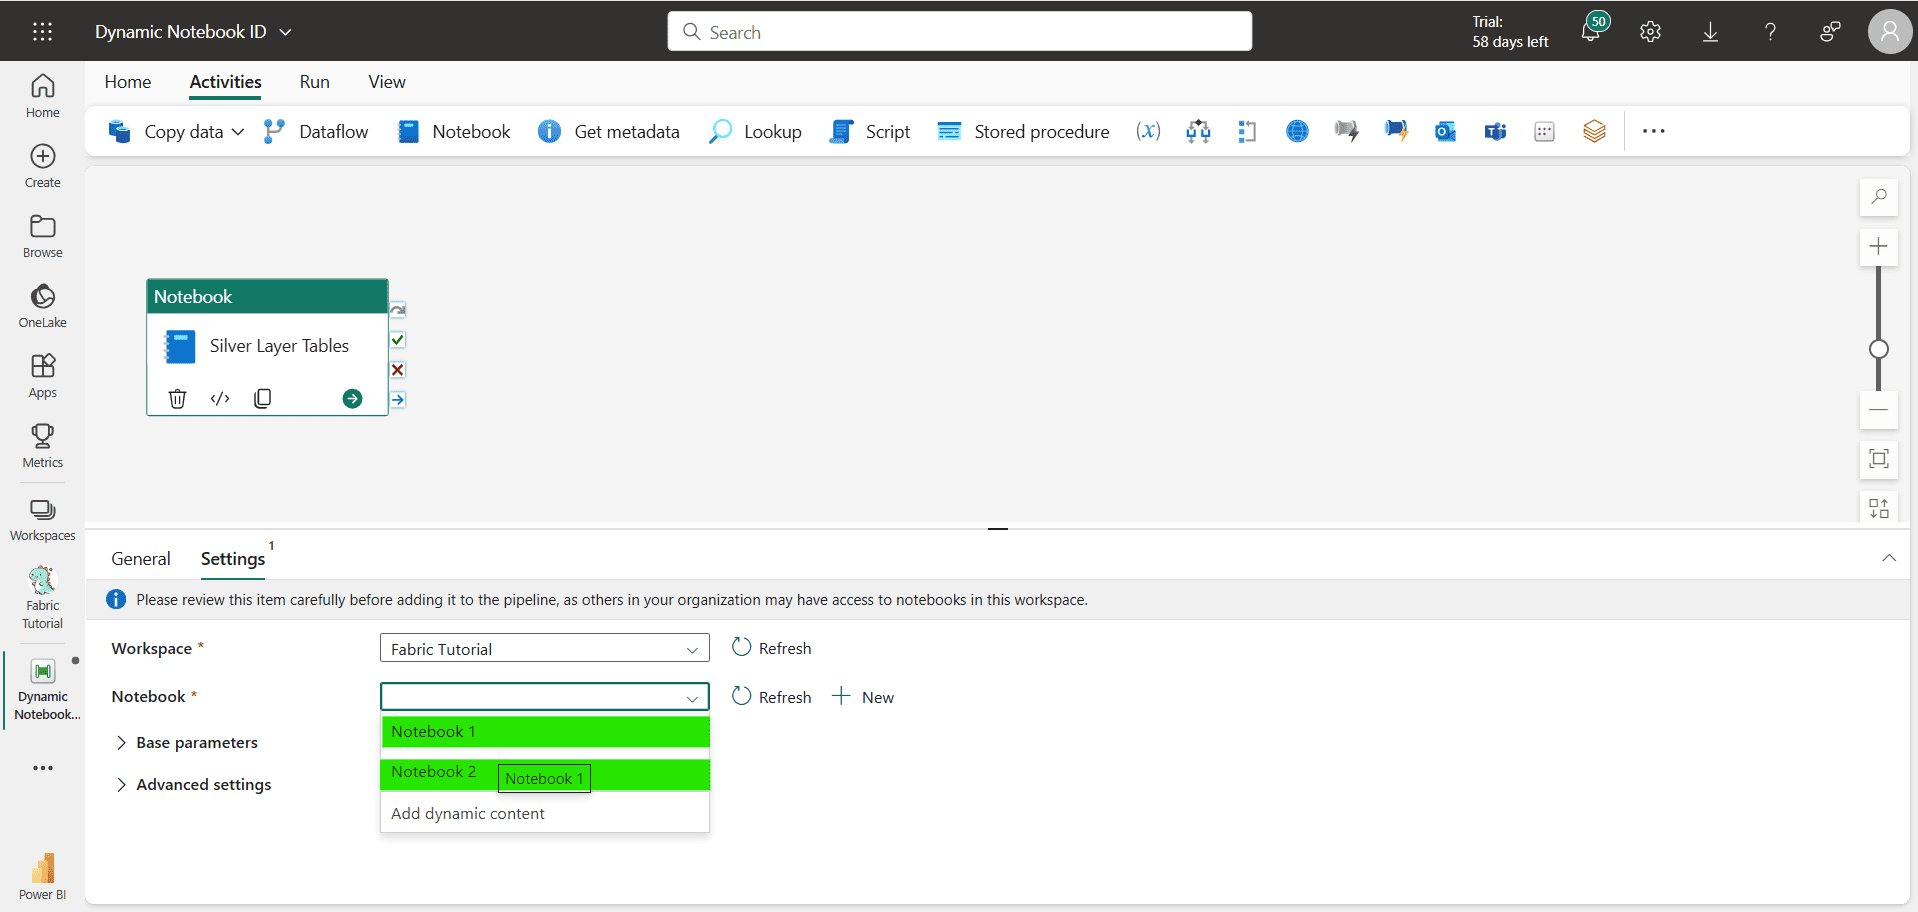
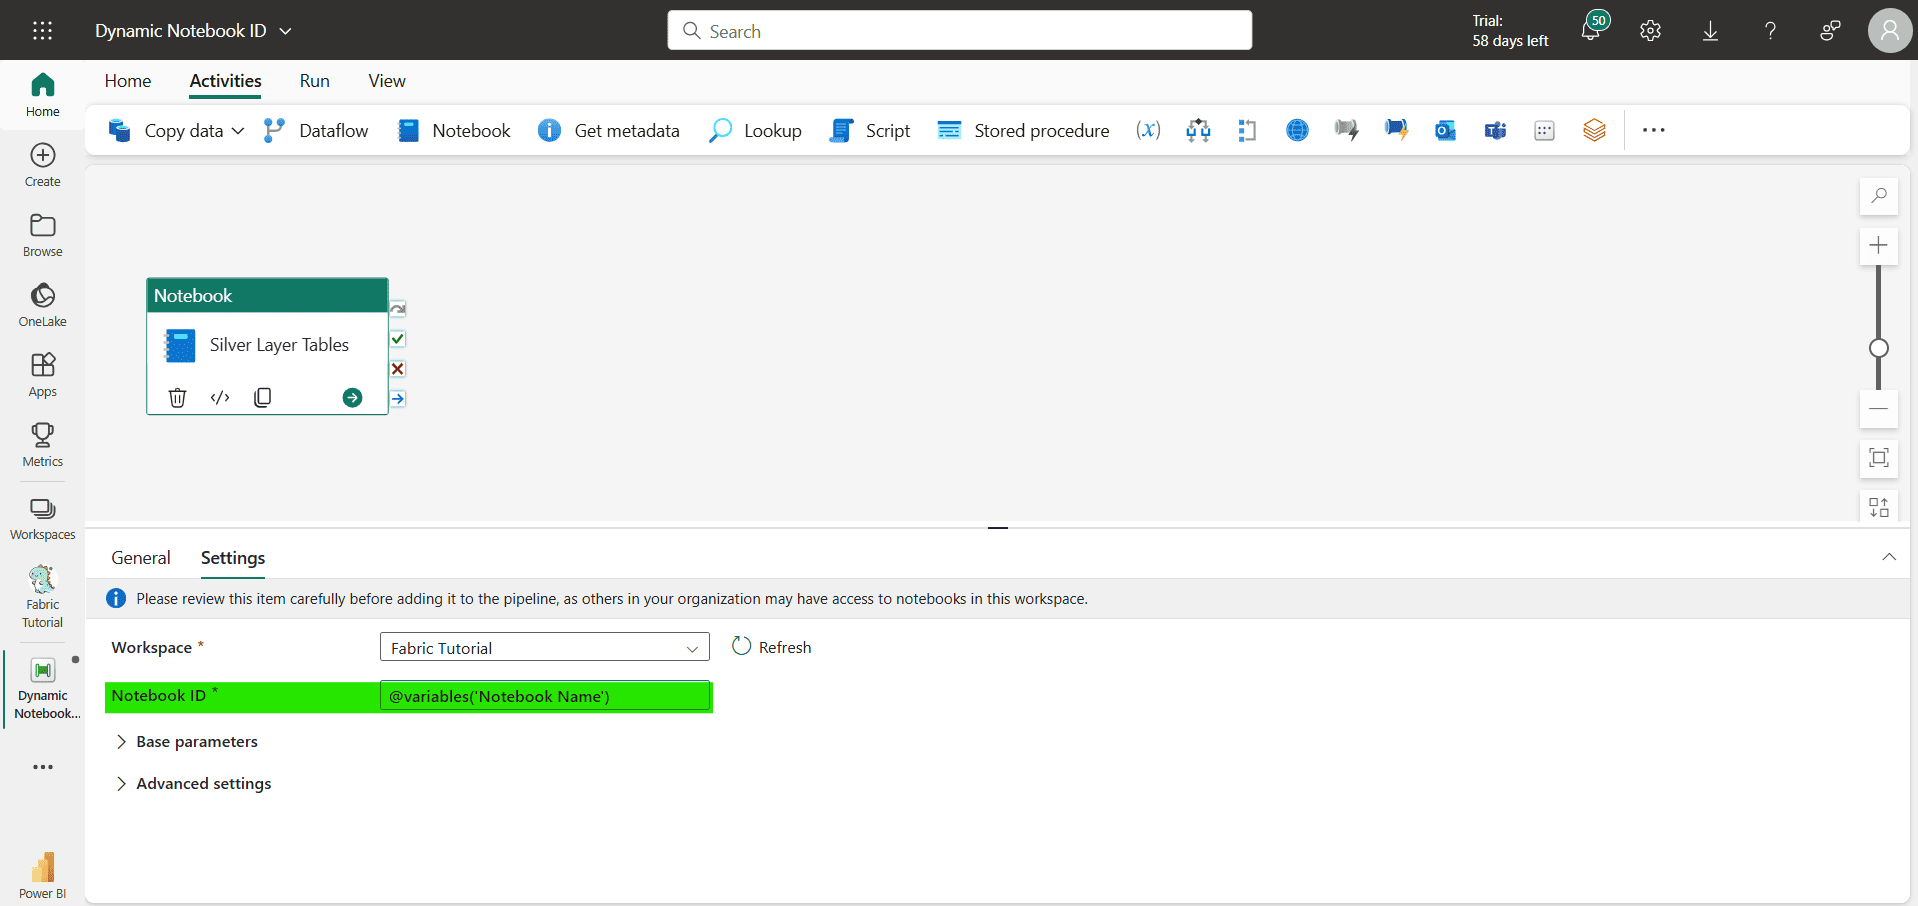
However, as soon as we add dynamic content to Notebook field, it switches to Notebook ID. If you have only one notebook to run then you can find this ID by opening notebook and looking it in web URL. Incase you have lot of different notebooks to run in one go, then it can become challenging to keep track of all notebooks IDs.
One simple solution is to automate this process of getting IDs for all notebooks present in our workspace. First we will create a Microsoft Fabric Notebook and get list of all notebook details using Fabric REST API. Later we will use these IDs in our Fabric data pipeline.
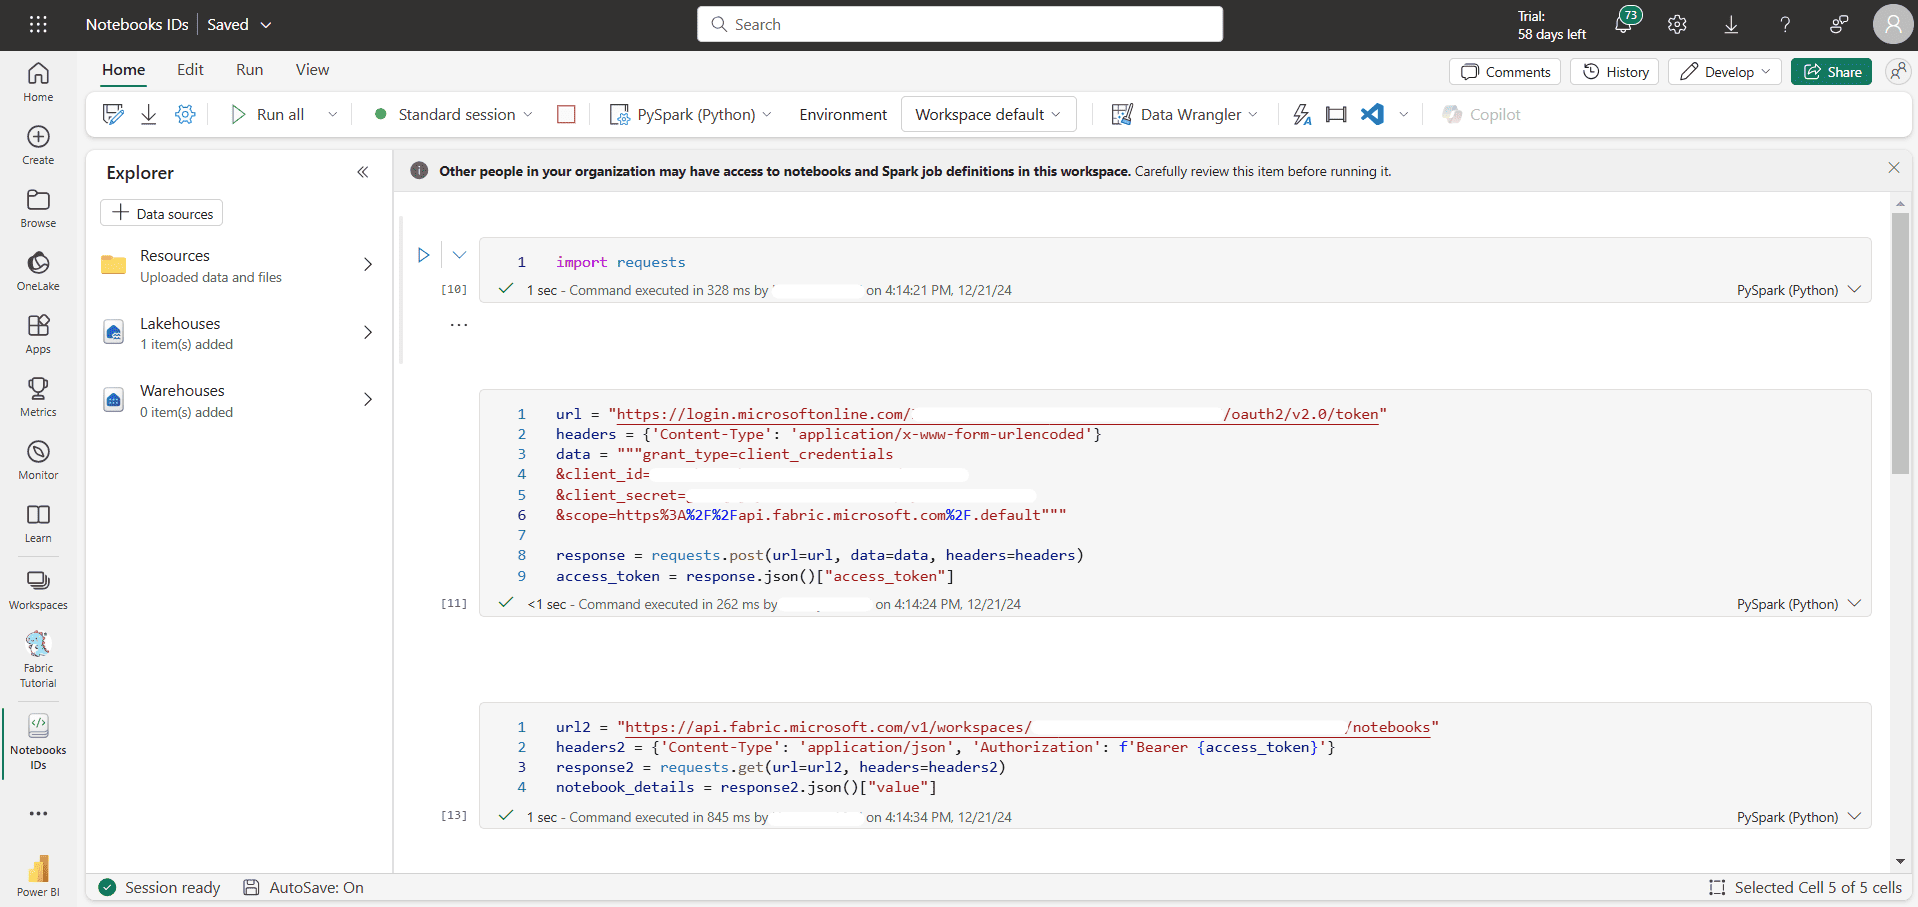
In our notebook, first we import Python’s requests library. Next we get the access token. For this we need Tenant ID, Client ID and Client Secret from our Azure App Registration. Incase you are not familiar about this, follow our Create Azure App Registration for Microsoft Fabric tutorial.
Then using this access token we call Fabric REST API to get details of all notebooks present in our workspace. We will provide ID of Fabric Workspace in the API URL. You can find this ID in the web URL when you open a Fabric Workspace.
Next we will save the results returned by Fabric REST API into a dataframe and write them in a delta format table in a Lakehouse. A Fabric lakehouse was already attached to our notebook.
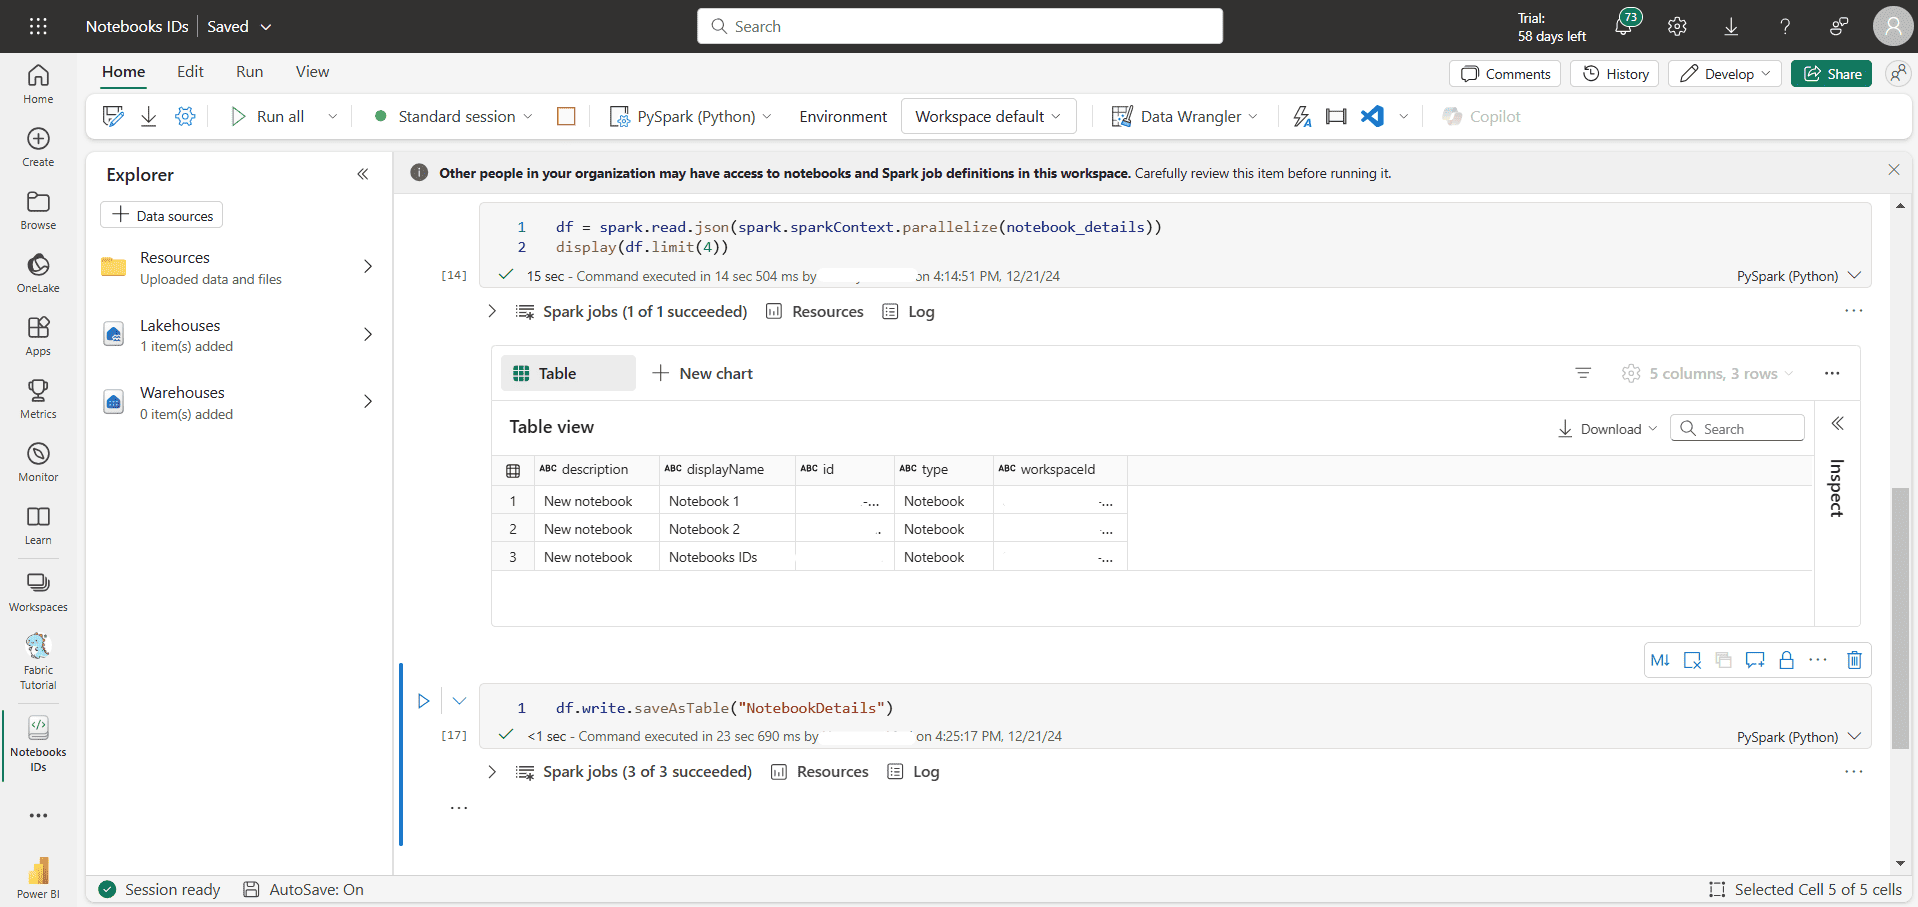
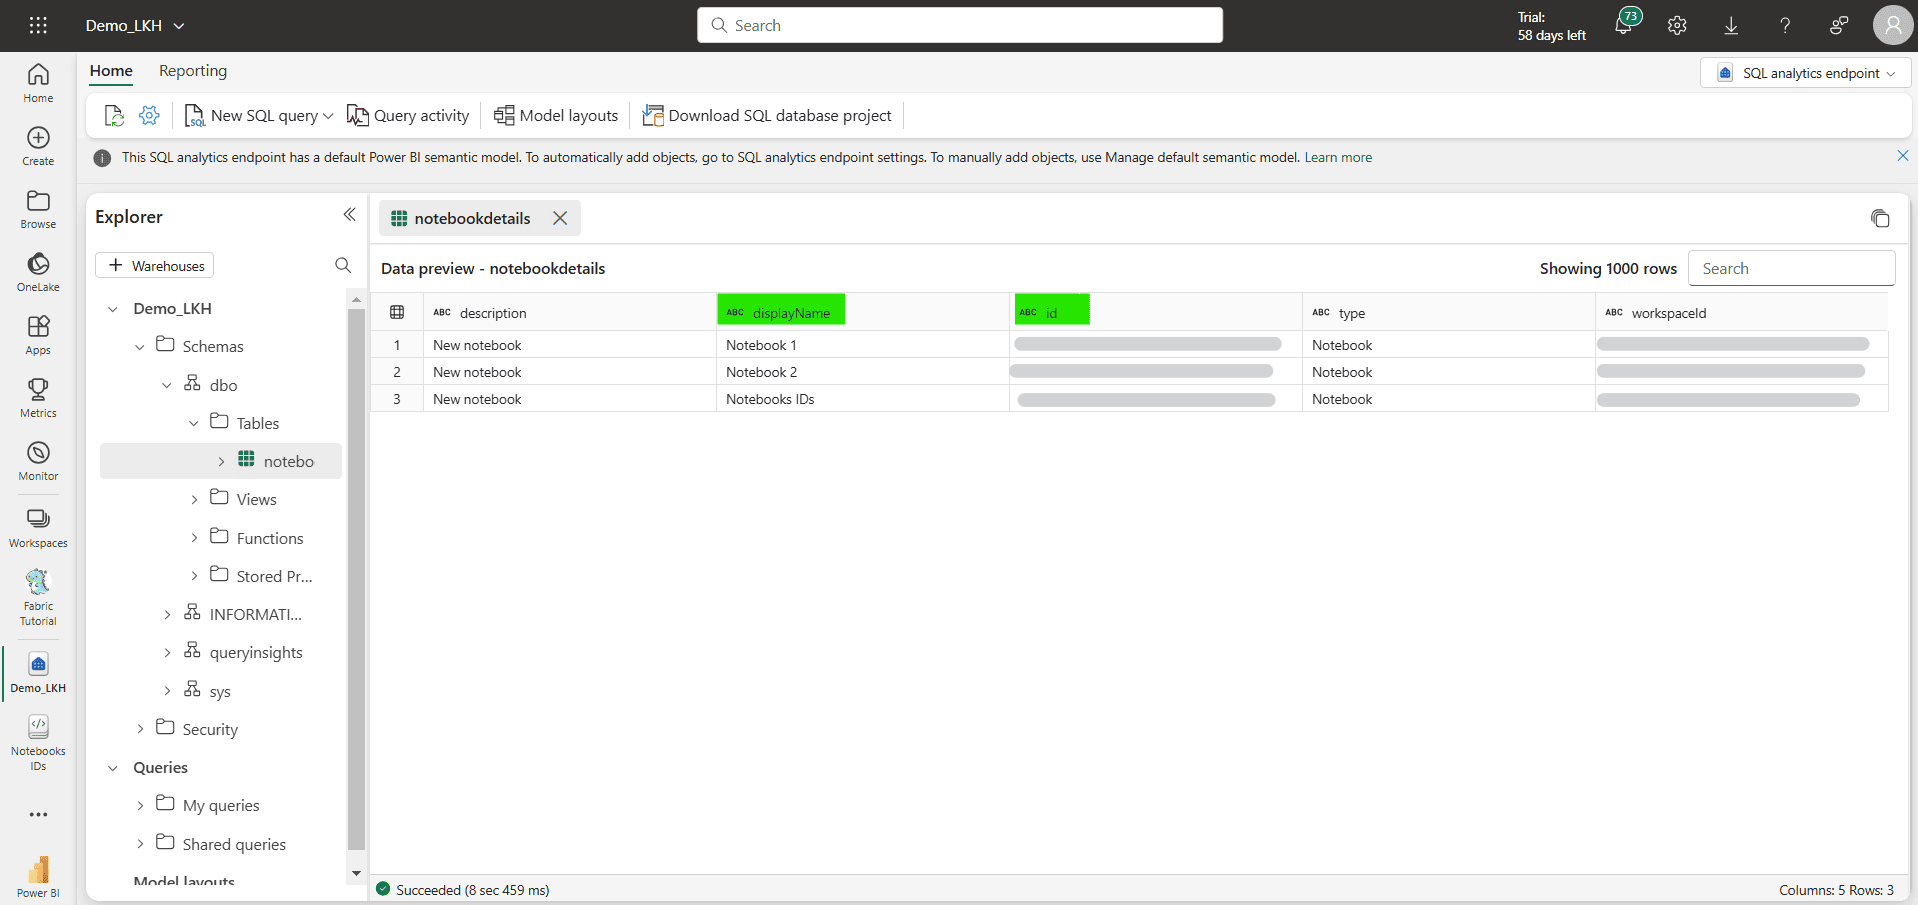
Checking table data, we can see following details for each notebook:
description
displayName
id
type
workspaceid
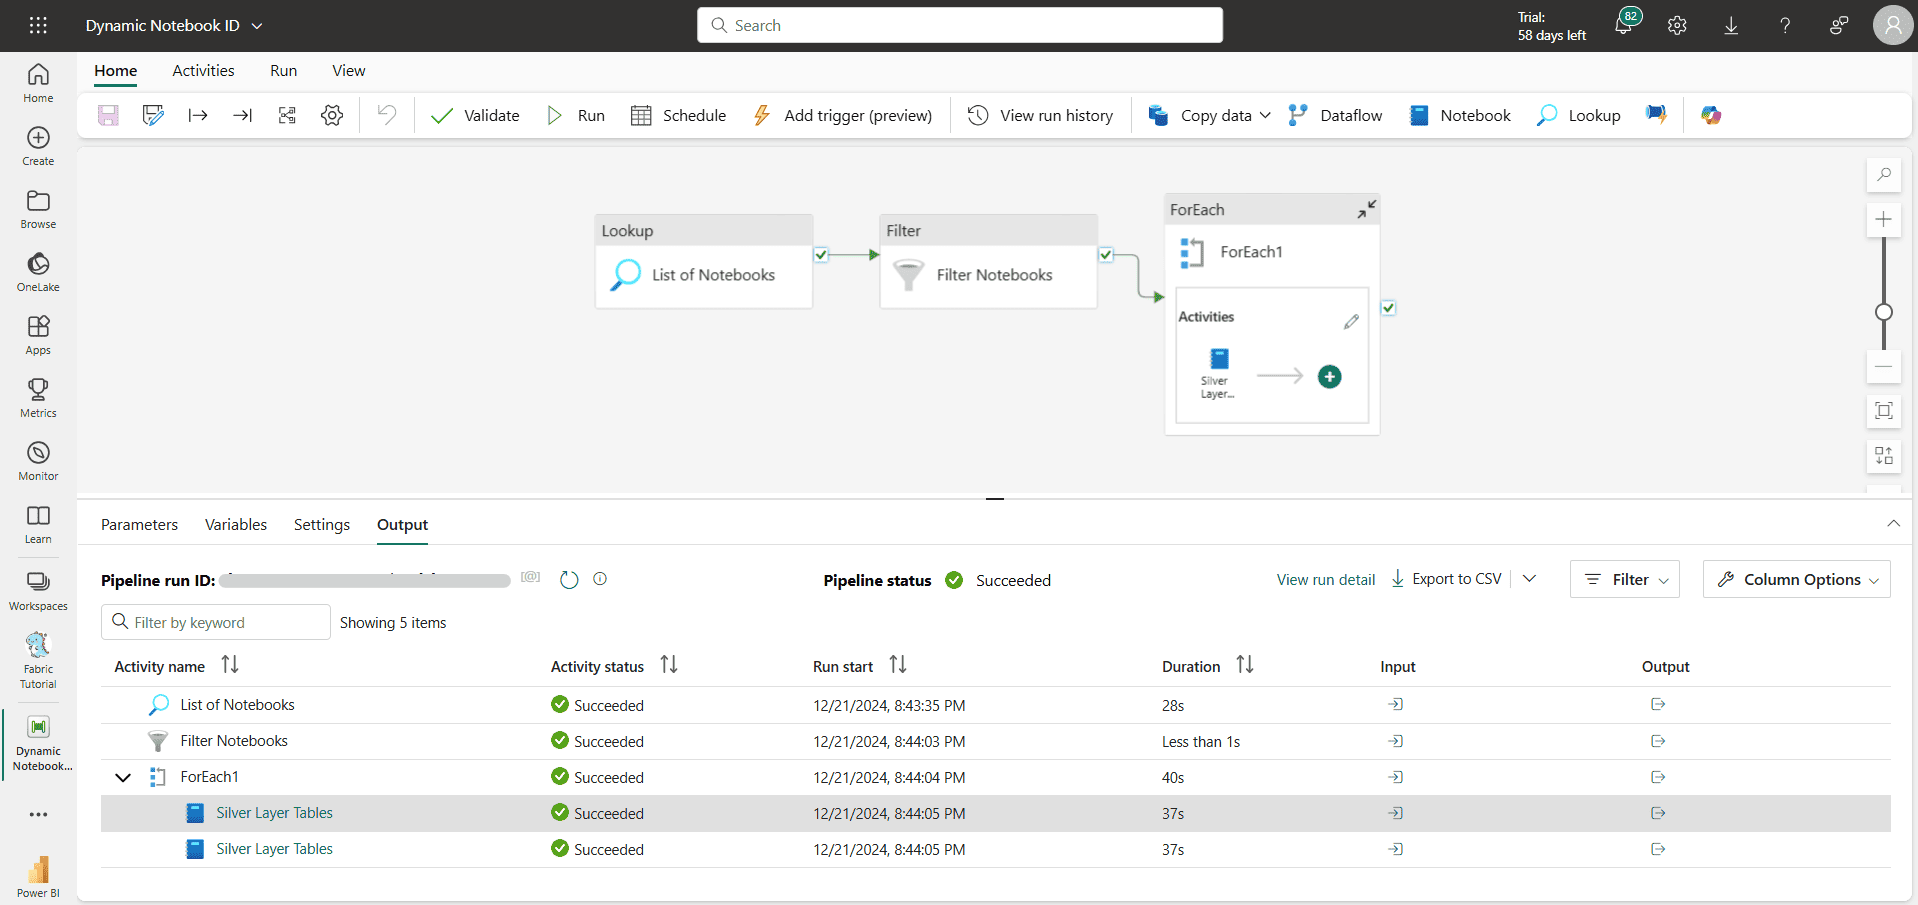
Now that we have details of all the notebooks present in our Fabric workspace, we are ready to use them in our Fabric data factory pipeline. Here is what our pipeline will look like at the end.
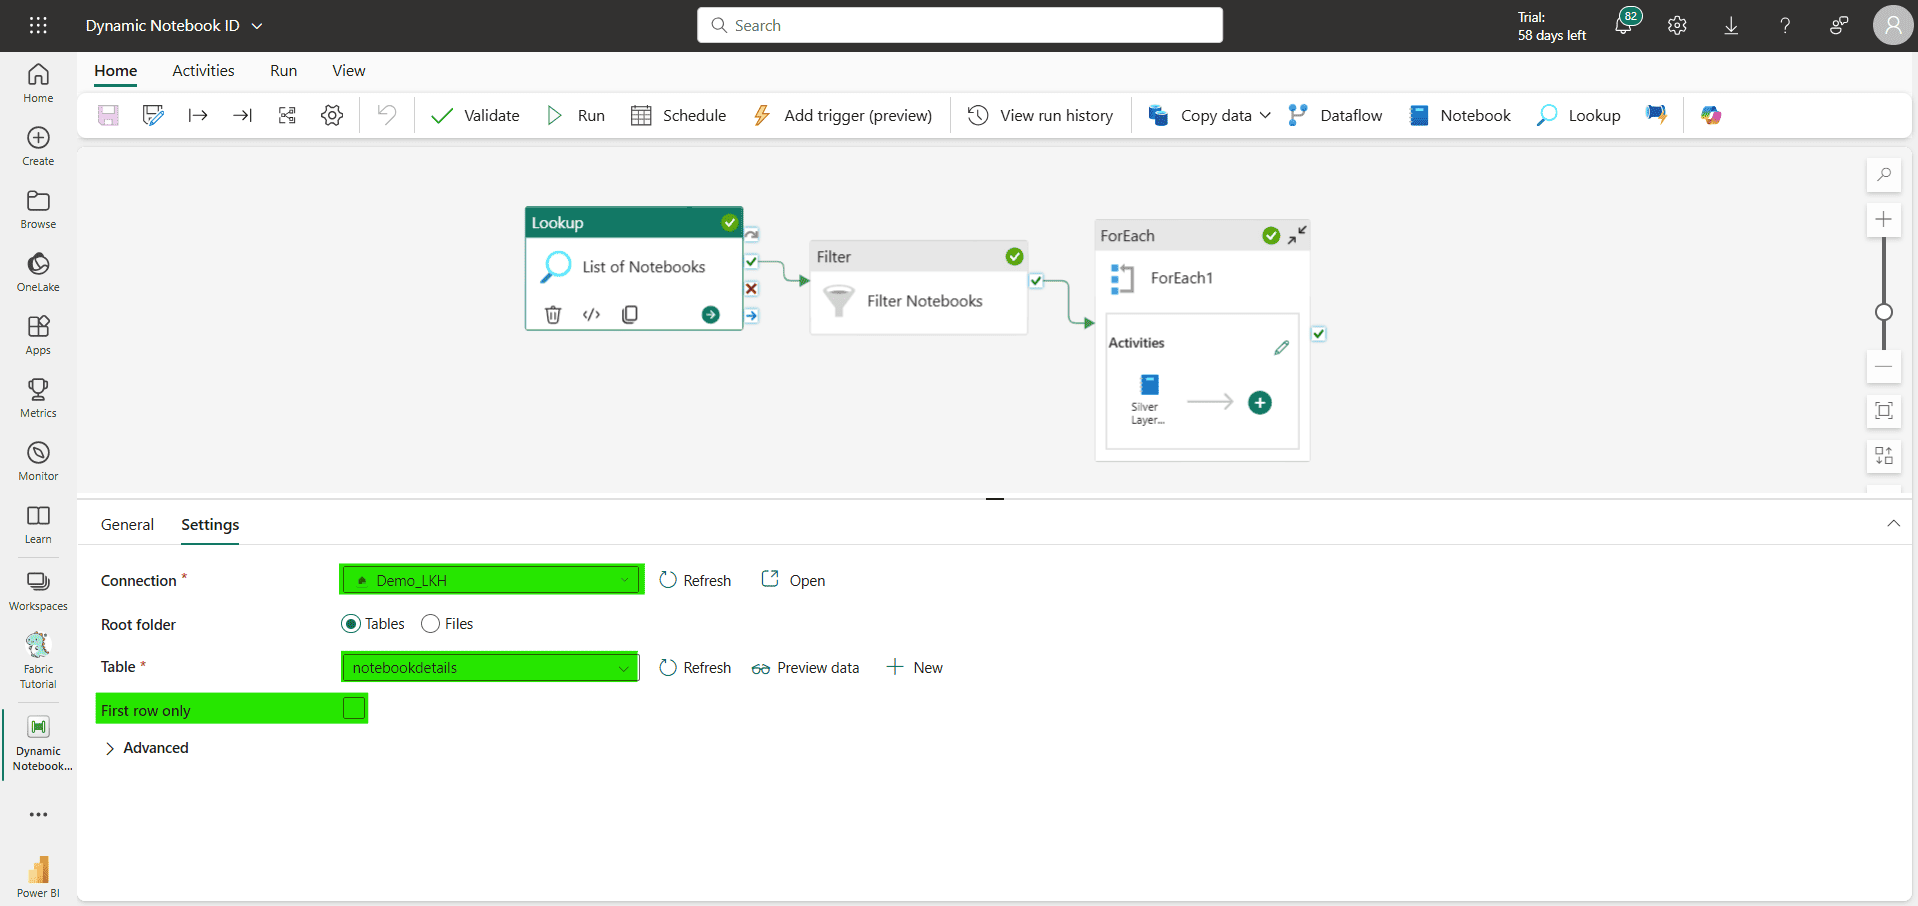
First add a Lookup activity in pipeline. Select workspace and name of table that we created using Notebook. Uncheck First row only option.
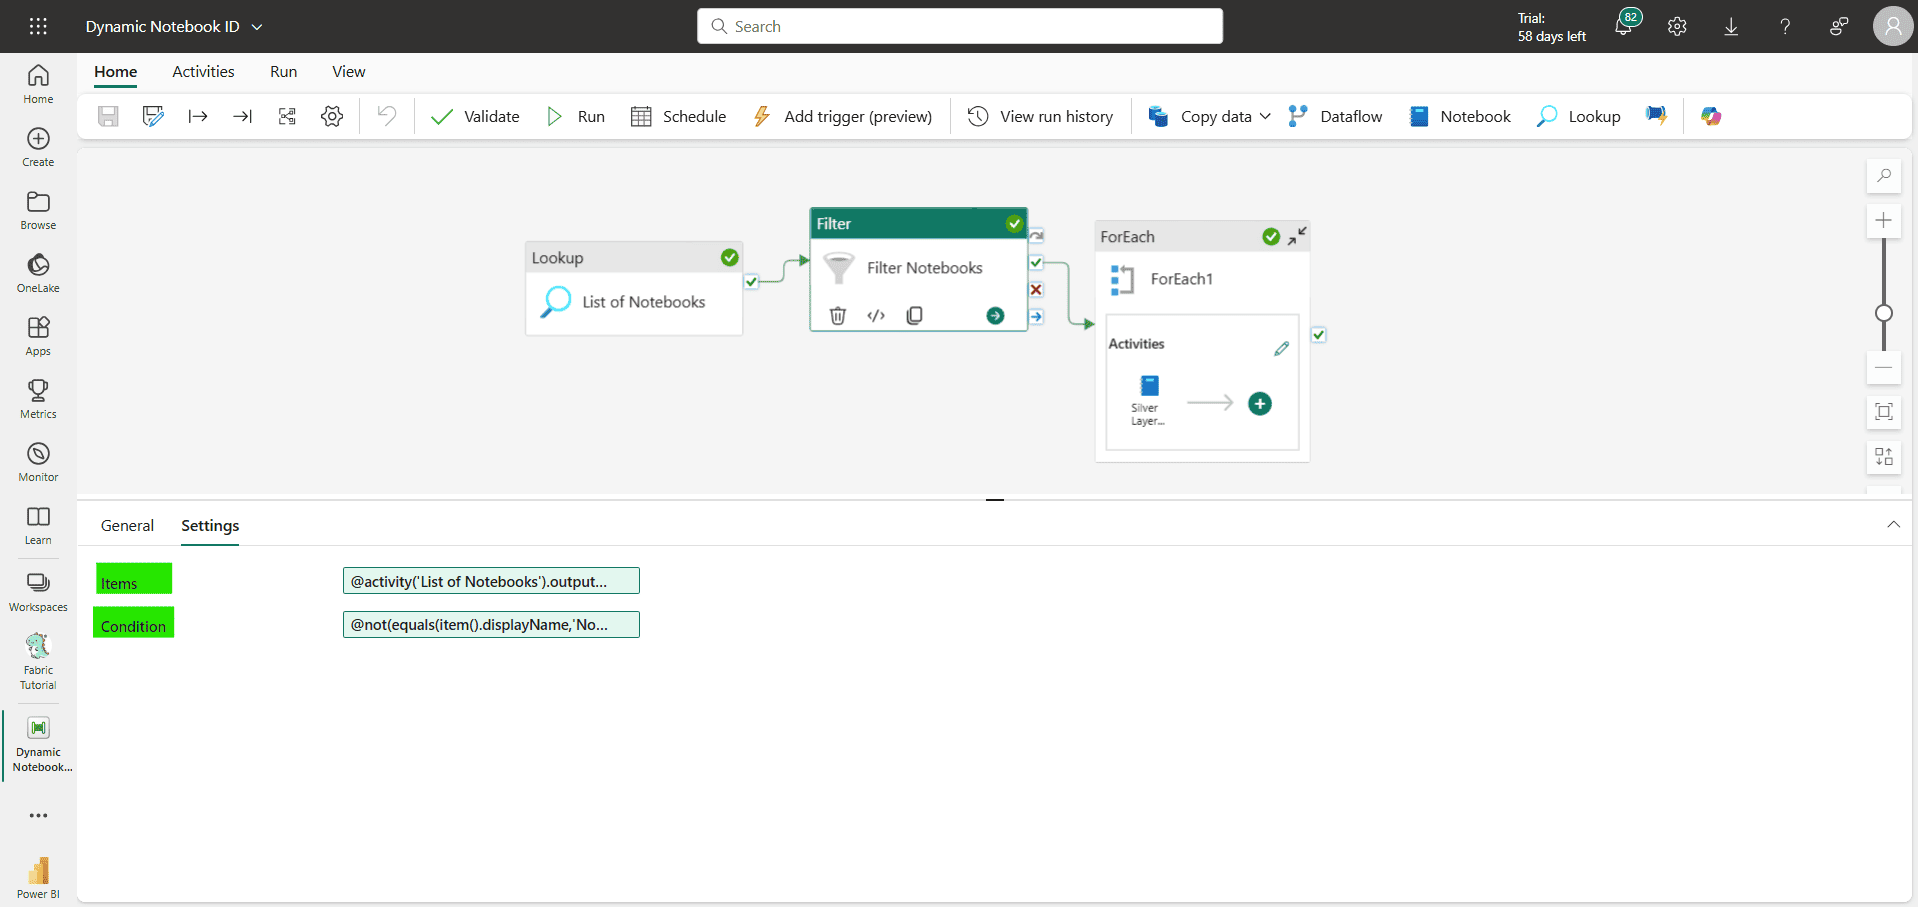
Add a Filter activity and connect Lookup activity to this. In Items and Condition option, add dynamic content as:
Items: @activity(‘List of Notebooks’).output.value
Condition: @not(equals(item().displayName,’Notebooks IDs’))
This activity is added to filter out the notebook which we created to get all the notebook details.
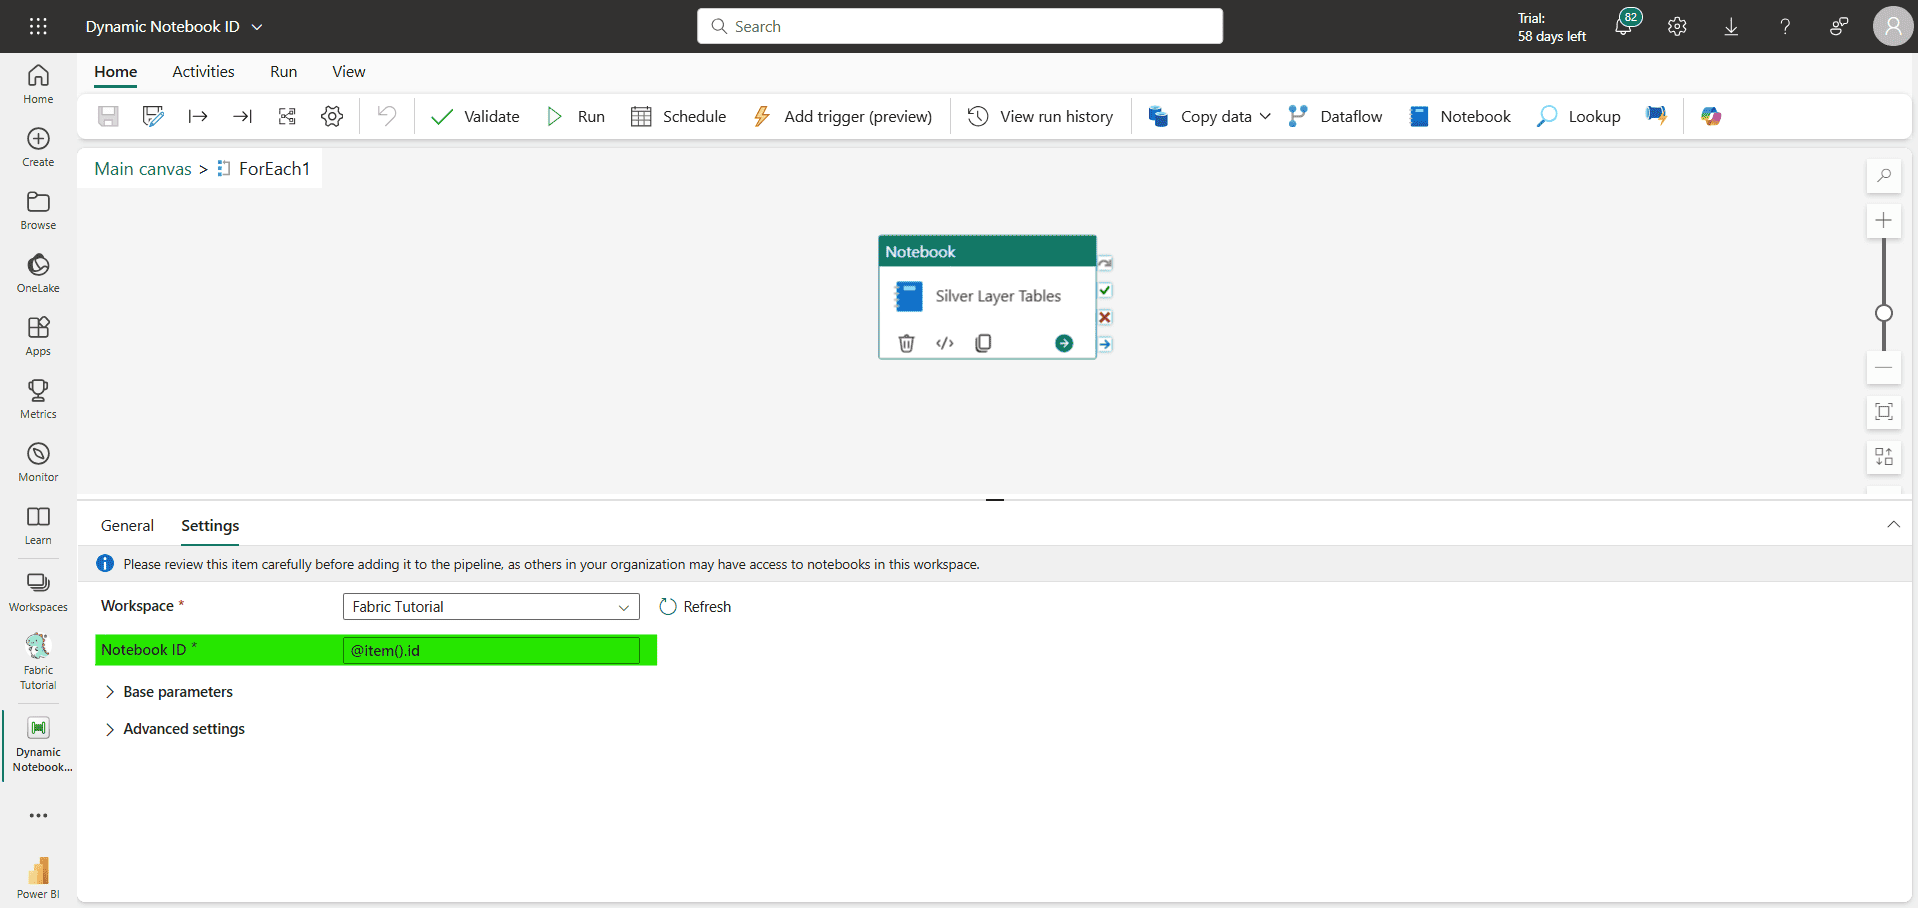
Add ForEach activity and connect Filter activity to it. In settings set Items option to: @activity(‘Filter Notebooks’).output.value

Go in ForEach activity and add a Notebook activity. In settings, set Notebook ID option to: @item().id
Now our Fabric data pipeline is setup. Save and run it to check the results. You can see in screenshot below that our two notebooks ran successfully.
This tutorial was to show basic setup to get and use notebook ids in Microsoft Fabric data pipeline. Depending on your requirements, you might need to add more columns in the notebook details table, have different filtering criteria of notebooks etc. , so you can add more items in this setup accordingly.